Your kitchen island can become the heart of your home if you plan it right. I’ll walk you through seven practical strategies that balance functionality with style.
From sizing your seating to layering lighting, each decision shapes how your family uses this space. The question isn’t whether your island can improve your kitchen. It’s which of these proven approaches will work best for your layout.
Plan Your Island Size and Seating Capacity
How do you determine the right island dimensions for your kitchen? Start by calculating your space needs. I recommend planning 24 inches of space per person for comfortable seating around your island.
Plan 24 inches of seating space per person to determine your ideal kitchen island dimensions.
Your island length directly influences seating capacity. Longer islands accommodate more stools or chairs; up to eight seats in spacious kitchens with rectangular designs. This layout maximizes your entertaining potential.
Consider knee clearance carefully. Standard chairs require 18–19 inches, while bar stools need just 12 inches. I’ve found this detail important for comfort and usability.
Balance seating with prep zones to maintain smooth workflow. Don’t sacrifice functionality for seating. Your island should serve both purposes effectively, creating an inviting gathering space while preserving easy kitchen access.
Add Comfortable Seating to Create a Gathering Hub

Why does seating convert an island from a prep station into a social centerpiece? Strategic island seating changes your kitchen workspace into a gathering hub where family and friends naturally congregate.
Choose breakfast-bar-height seating paired with traditional chairs or bar stools for flexibility. Standard chairs require 18–19 inches of knee clearance, while bar stools need approximately 12 inches. This distinction directly impacts comfort and functionality.
Plan 24 inches of open space per person around your island. This measurement supports comfortable seating and easy access to surrounding prep zones. Larger rectangular islands accommodate up to eight seats, supporting casual meals and conversations simultaneously.
Align seating with your island’s workflow. Position chairs to allow unobstructed movement between storage areas and preparation spaces. Strategic placement promotes social interaction while maintaining efficient kitchen operations.
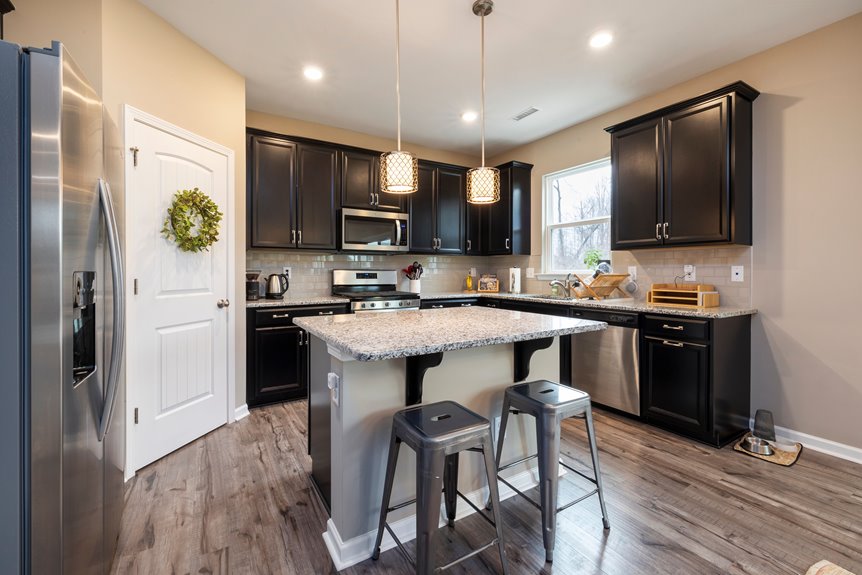
Make Your Island Pop With Color and Contrast

I can make my kitchen island a striking focal point by strategically using color and contrast. Pairing a dark island with light cabinetry, or reversing this combination, creates visual dimension that draws the eye.
I might also introduce a bold, brightly colored island to add playfulness while keeping my overall kitchen palette balanced and well-coordinated.
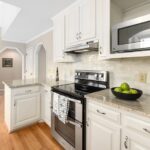
Dark Island, Light Cabinetry
When you’re ready to make your kitchen island the star of the show, pairing it with light cabinetry is one of the most effective design moves you can make. This contrast creates a striking focal point that draws the eye immediately. A dark island against pale cabinets enhances visual depth and adds dimension to your entire kitchen. The contrast prevents your space from feeling flat or one-dimensional.
To maximize this effect, pair your dark island with light countertops and matching hardware. This approach helps the island stand out without overwhelming the room. Consider anchoring your seating and dining zones around the dark island for visual cohesion.
Balance the darker tones by incorporating lighter wood or open shelving nearby, preventing the space from feeling too heavy or cramped.
Bright Colors Add Playfulness
How can you make your kitchen island a vibrant centerpiece that commands attention?
Bright colors introduce playfulness to your kitchen while serving as a strong focal point. When you pair a vivid island with lighter cabinetry or walls, you create striking contrast that draws the eye immediately.
Consider these strategies for success:
- Balance with Hardware – Coordinate your bright island color with matching hardware and finishes to maintain cohesion throughout your kitchen.
- Embrace Furniture-Like Design – Combine bright colors with open shelving or glass-front details to make your island a statement piece.
- Plan for Maintenance – Evaluate cleaning needs of vivid surfaces beforehand. Bright finishes require regular upkeep to maintain their vibrant appearance.
This approach makes your island a personalized focal point reflecting your style.
Choose a Countertop Material and Edge Style
Your island’s countertop material and edge style work together to define both function and visual impact in your kitchen. I’ll help you explore how different materials like granite, quartz, and butcher block perform in daily use, and why edge treatments matter for maintenance and aesthetics.
These choices determine whether your island becomes a practical workspace or a prominent design feature.
Material Selection Matters
What surface will anchor your kitchen island and withstand years of cooking, chopping, and daily wear? Your choice shapes both function and style.
Butcher block brings warmth but requires regular oiling to stay protected. Quartz offers durability with minimal maintenance, ideal for busy kitchens. Granite and marble provide elegance, though they need sealing. Recycled glass creates visual interest while supporting sustainability.
Your edge design matters equally. Waterfall edges extend vertically to the floor, creating seamless lines that work well in small spaces. Beveled or bullnose edges offer easier cleaning by reducing dirt-trapping corners.
Match your selection with existing cabinetry and flooring for a unified appearance. Consider your cooking habits: prioritize heat resistance for frequent use or choose materials that match your aesthetic vision. Consulting a designer helps your countertop choice work with your complete kitchen plan.
Edge Design Considerations
Once you’ve selected your countertop material, the edge profile becomes your next design decision. This choice markedly impacts both aesthetics and maintenance.
A waterfall edge extends your countertop vertically to the floor, creating visual continuity. This style works beautifully with quartz, marble, and granite. It makes compact kitchens feel more spacious while reducing visible seams.
Consider your maintenance priorities when selecting an edge profile. Smoother profiles have fewer nooks and crannies, making cleaning easier and preventing dirt buildup. This durability benefit matters for busy kitchens.
Seam coordination creates visual flow between your edge and cabinetry colors. Match your countertop material’s undertones to surrounding finishes for a cohesive appearance.
Your countertop material ultimately guides edge options. Different materials pair best with specific profiles for optimal performance and design impact.
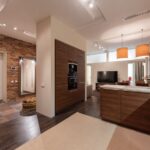
Give Your Island a Furniture Look

Kitchen islands don’t have to look like built-in cabinets. I’ve seen designers create furniture pieces that serve as a beautiful focal point in a room. A furniture-inspired island uses cabinet-finish legs and open shelving to create that lighter, airier aesthetic you’re seeking.
The floating island effect enhances space perception by passing light underneath. This open shelving reduces visual weight while maintaining full functionality. Match your finishes with adjacent cabinetry and hardware to unify your kitchen’s style. A distinct countertop material anchors the island as your centerpiece.
Consider adding a breakfast bar or integrated seating to invite casual dining and conversation. This turns your workspace into a social gathering spot. The result is an island that blends functionality with gallery-like elegance, becoming the centerpiece within your open-plan layout.
Layer Lighting for Ambiance and Task Work

How you light your island determines whether it functions as a practical workspace or an attractive design focal point. I recommend combining pendant lighting with layered lighting to achieve both task work and ambiance.
Pendant lighting provides focused illumination for prep work and cooking. Position fixtures 30-36 inches above the countertop for ideal task lighting without glare. Pair multiple pendants on larger islands or single pendants on smaller ones.
| Lighting Layer | Purpose | Best Placement |
|---|---|---|
| Pendant Lighting | Task illumination | 30-36″ above counter |
| Under-Cabinet Lights | Prep surface lighting | Mounted on cabinetry |
| Ambient Lighting | Mood and atmosphere | Ceiling or walls |
| Accent Lighting | Highlight island features | Directional fixtures |
Layered lighting creates a flexible kitchen island design that adapts to different times of day. By combining these approaches, you’ll establish an inviting focal point while keeping your island functional for everyday cooking and entertaining.
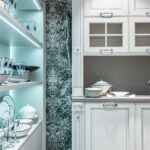
Hide Clutter With Smart Island Storage
Beyond creating the perfect lighting, your island needs purposeful storage to keep daily essentials within arm’s reach while maintaining a clean, organized appearance.
Smart island storage hides clutter effectively. Consider these solutions:
Smart island storage hides clutter effectively while keeping daily essentials within arm’s reach for functional, beautiful kitchens.
- Cabinets and drawers house cookware, dishware, and baking supplies efficiently
- Pull-out bins integrate waste and recycling near prep areas seamlessly
- Hidden storage organizers maximize space while keeping items accessible daily
- Open shelving options display items while maintaining organized aesthetics
Your island’s construction should be sturdy enough for cooking and entertaining demands. Large islands accommodate both seating and concealed storage simultaneously, allowing you to enjoy functionality without visual chaos.
Pull-outs and organizers improve daily use significantly. This integrated approach keeps your kitchen workspace uncluttered while making sure everything you need stays conveniently close. You’ll create an inviting space that works as hard as you do.