
Mint Chocolate Chip Ice Cream brings together the cool, refreshing flavor of mint with rich chocolate chips for a delightful treat.
This classic dessert is a beloved favorite, perfect for warm weather and special occasions alike.
I remember savoring this sweet indulgence during summer family gatherings, where laughter and joy filled the air.
With the Ninja Creami, making homemade ice cream has never been easier or more satisfying, allowing you to create a creamy, dreamy dessert that everyone will love.
The History and Cultural Significance
• Mint Chocolate Chip Ice Cream traces its origins to the United States in the late 19th century, where it quickly gained popularity among ice cream enthusiasts.
• The dish evolved as ice cream recipes became more accessible, with mint flavoring being a refreshing choice for warm weather desserts.
• In American culture, this ice cream flavor traditionally appears at summer barbecues, birthday parties, and holiday celebrations, symbolizing joy and togetherness.
• While many variations exist, the authentic mint chocolate chip ice cream maintains a balance of creamy mint flavor paired with crunchy chocolate chips that sets it apart from imitations.
Recipe Overview
Nutritional Information (per serving)
Ingredients
Essential Equipment Guide
Ninja Creami: This specific tool is essential for creating smooth and creamy ice cream at home. Look for models with multiple functions to make a variety of frozen desserts.
Mixing Bowl: A sturdy mixing bowl is crucial for combining your base ingredients. Opt for a bowl with a non-slip bottom for ease of mixing.
Measuring Cups and Spoons: Accurate measurements are important for achieving the right flavor balance. Use clear, easy-to-read measuring tools for precision.
Preparation Methods
Infusing Mint Flavor: This technique involves steeping fresh mint leaves in your cream mixture. It allows the mint to release its natural oils and flavors, enhancing the overall taste of the ice cream.
Chilling the Base: It’s essential to chill your ice cream base before churning. This process improves the texture and helps achieve a creamy consistency by minimizing ice crystals.
Mixing in Chocolate Chips: Adding chocolate chips at the right time is key. This ensures they are evenly distributed throughout the ice cream and do not sink to the bottom.
Step 1: Prepare the Ice Cream Base

In a mixing bowl, combine heavy cream, whole milk, and granulated sugar.
Whisk the ingredients until the sugar is fully dissolved.
Make sure the mixture is smooth and creamy before moving to the next step.
This is crucial for achieving a well-blended ice cream base.
Step 2: Add Flavorings

Stir in the vanilla extract and peppermint extract into the ice cream base.
Mix thoroughly to ensure the flavorings are evenly distributed.
Taste the mixture to adjust flavor if needed, as mint intensity can vary.
This step is essential for creating a perfectly flavored ice cream.
Step 3: Infuse with Fresh Mint

Add fresh mint leaves to the ice cream base and stir.
Let the mixture sit in the fridge for at least 30 minutes to allow the mint to infuse its flavor.
You can taste the base during this time to adjust mint flavor if desired.
This infusion process is key to enhancing the mint flavor in the final product.
Step 4: Strain the Mixture

After the infusion, strain the mixture through a fine mesh sieve to remove the mint leaves.
Press gently on the leaves to extract as much flavor as possible.
This step ensures a smooth texture without any leafy bits.
It’s important for achieving a clean, creamy ice cream base.
Step 5: Churn the Ice Cream

Pour the strained mixture into the Ninja Creami and select the ice cream setting.
Churn according to the manufacturer’s instructions until it reaches a soft-serve consistency.
Be attentive to the texture, as this is the critical point for achieving creaminess.
This is where the magic happens, transforming the mixture into a delightful ice cream.
Step 6: Add Chocolate Chips

Once the ice cream is churned, add the dark chocolate chips to the mixture.
Gently fold them into the ice cream to ensure an even distribution.
Avoid mixing too vigorously to keep the texture light and airy.
This step gives the ice cream its signature chocolatey crunch.
Step 7: Freeze the Ice Cream

Transfer the ice cream to a freezer-safe container.
Press down gently to eliminate air pockets and cover tightly with a lid.
Freeze for at least 2 hours or until firm.
This final freezing step is essential for achieving scoopable ice cream.
Step 8: Serve and Enjoy

Once the ice cream is frozen solid, scoop it into bowls or cones.
Garnish with additional chocolate chips or fresh mint leaves for presentation.
Enjoy your homemade mint chocolate chip ice cream on a warm day, sharing it with family and friends.
This is the moment to celebrate your efforts and enjoy a delicious treat.
Critical Timing and Temperature Guide
Chilling the Base: Chill the ice cream base for at least 30 minutes before churning. Look for a slight thickening of the mixture. Common mistakes include not chilling long enough, which can lead to a less creamy texture.
Freezing the Ice Cream: Freeze the churned ice cream for at least 2 hours. The ice cream should be firm and scoopable. Avoid opening the freezer too often, as this can lead to temperature fluctuations.
Infusion Time: Allow the mint leaves to infuse for at least 30 minutes. The color of the base may slightly change. Over-infusing can lead to a bitter taste.
Pro Tips for Ninja Creami Ice Cream Recipes Mint Chocolate Chip Homemade
• Ingredient Selection: Choose high-quality heavy cream and pure peppermint extract for the best flavor.
• Preparation Secret: Chill your mixing bowl in the freezer before making the ice cream base to enhance the creaminess.
• Temperature Management: Ensure all ingredients are cold before beginning to churn for optimum texture.
• Texture Enhancement: Use a spatula to gently fold in chocolate chips, preserving air in the mixture.
• Flavor Layering: Experiment with different types of chocolate for varied flavor profiles, like dark or semi-sweet.
• Make-Ahead Strategies: Prepare the base a day in advance and store it in the fridge for maximum flavor development.
• Restaurant-Quality Finishing Touches: Serve with a drizzle of melted chocolate or a sprig of fresh mint on top.
• Equipment Optimization: Make sure your Ninja Creami is clean and properly assembled for the best results.
Troubleshooting Common Issues
• Texture Too Dense: This may occur if the base was not chilled adequately before churning. Ensure a 30-minute chill time next time, and consider adding a bit more milk to the mixture.
• Ice Cream Too Soft: If the ice cream is too soft after churning, it may need more time in the freezer. Ensure the freezer is at the correct temperature, ideally around -10°F.
• Mint Flavor Weak: If the mint flavor is lacking, increase the amount of peppermint extract or allow the fresh mint to steep longer in the base.
• Chocolate Chips Sinking: To prevent this, consider freezing the chocolate chips for a bit before adding them to the churned ice cream. This helps them retain structure during mixing.
• Ice Crystals Forming: Ice crystals can form if the ice cream is not stored properly. Use a tightly sealed container and minimize air exposure for better texture.
• Overly Sweet: If the ice cream is too sweet, reduce the sugar next time or balance it out with a touch of salt.
Variations and Regional Differences
• Chocolate Mint Swirl: This variation incorporates a rich chocolate fudge swirl into the mint base, adding a decadent twist.
• Vegan Mint Chocolate Chip: Use coconut cream and dairy-free chocolate chips for a vegan-friendly version without sacrificing flavor.
• Mint Chip Milkshake: Blend the ice cream with milk for a creamy milkshake version, perfect for warm days.
• Modern Interpretations: Consider adding unique ingredients like crushed Oreos or switching to a dark chocolate base for a gourmet touch.
Food Science Behind the Recipe
• Emulsification: The heavy cream and milk create an emulsion, which is crucial for achieving a smooth and creamy texture in ice cream.
• Freezing Point Depression: Sugar lowers the freezing point of the ice cream, preventing it from becoming rock hard when frozen.
• Air Incorporation: Churning the ice cream incorporates air, creating a light and fluffy texture that differentiates it from a dense frozen dessert.
Frequently Asked Questions
What’s the most common mistake people make when preparing Mint Chocolate Chip Ice Cream? The most common mistake is not chilling the base long enough, which can lead to a less creamy texture.
Can I prepare components of this dish in advance? Yes, you can make the ice cream base a day ahead and store it in the fridge.
How do I adapt this recipe for dietary restrictions? To make it dairy-free, substitute heavy cream and milk with coconut cream and almond milk.
What’s the best way to store and reheat leftovers? Store in a tightly sealed container in the freezer for up to 2 weeks.
Can I freeze this dish? Yes, the ice cream can be frozen, but ensure it’s stored properly to avoid ice crystals.
What wine or beverages pair best with this dish? A light dessert wine or minty cocktails pair beautifully with the fresh flavors.
How can I scale this recipe up for a crowd? Simply multiply the ingredient quantities by the number of servings desired, and ensure your Ninja Creami can handle the larger batch.
What side dishes complement this recipe best? Light fruit salads or berry compotes work well with the mint chocolate chip flavor.
How do professional chefs elevate this dish for restaurant service? Chefs often use high-quality chocolate and fresh herbs for garnish, along with unique serving dishes.
Serving and Presentation Guide
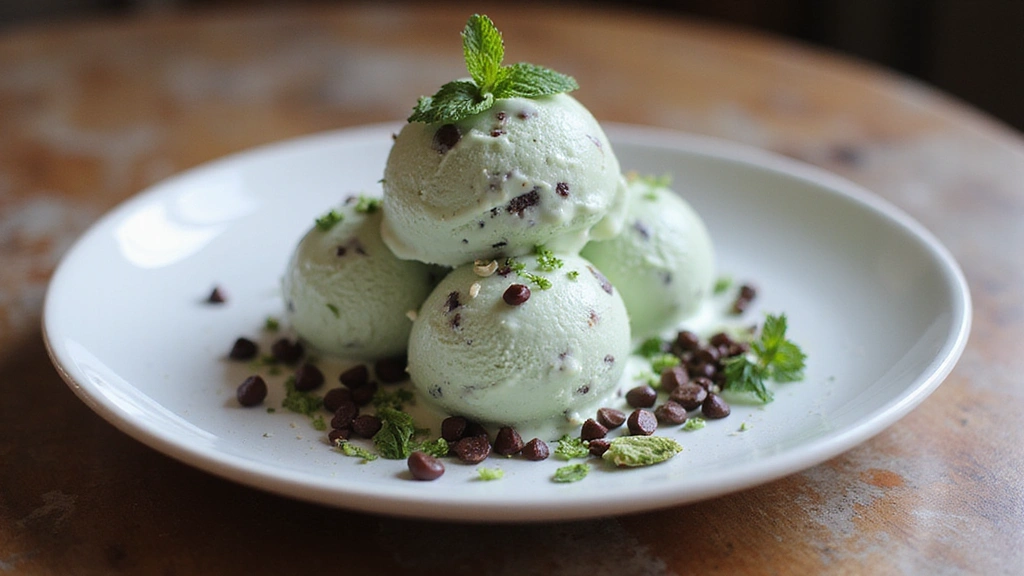
• Traditional Presentation: Serve in a white bowl to highlight the vibrant mint color, garnished with fresh mint leaves and chocolate shavings.
• Modern Plating Ideas: Create a dessert plate with a scoop of ice cream alongside a drizzle of chocolate sauce and a sprig of mint for a sophisticated look.
• Accompaniment Suggestions: Pair with a light berry compote or shortbread cookies for added texture and flavor contrast.
• Special Occasion Presentation: For celebrations, serve in elegant glasses topped with whipped cream and a chocolate straw.
Conclusion
Making Mint Chocolate Chip Ice Cream at home is a rewarding experience that brings joy to any occasion.
With the Ninja Creami, you can easily create this deliciously creamy treat that everyone will love.
I encourage you to try this recipe and enjoy the satisfaction of homemade ice cream with your loved ones.