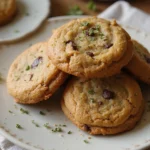
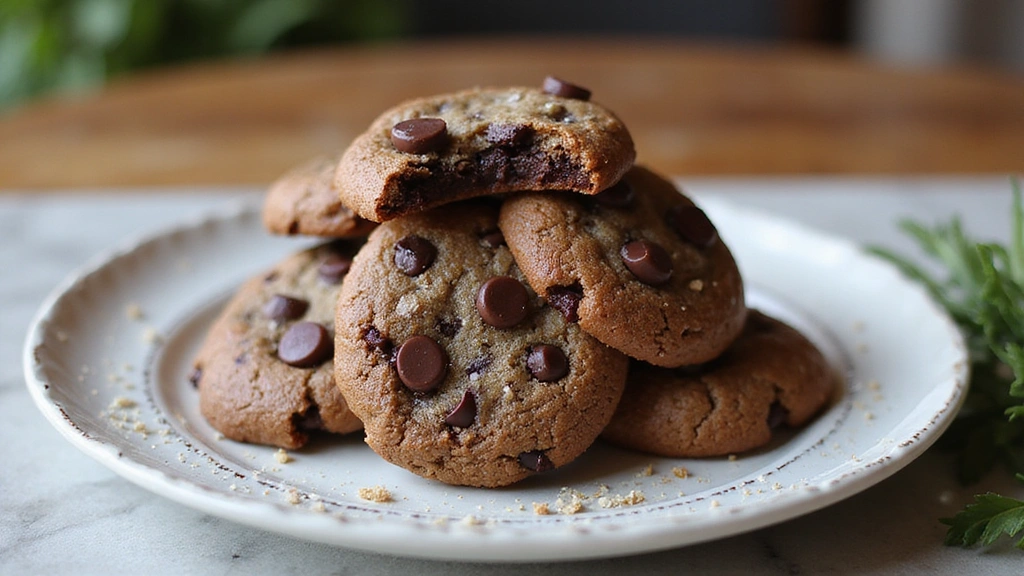
These Sea Salt Chocolate Chip Cookies are the ultimate treat for cookie lovers.
With their chewy centers and gooey chocolate, they provide a delightful contrast that is hard to resist.
The addition of sea salt enhances the sweetness of the chocolate, creating a perfect balance of flavors.
Whether you’re enjoying them fresh out of the oven or savoring them with a glass of milk, these cookies are sure to satisfy your sweet tooth.
The History and Cultural Significance
• Sea Salt Chocolate Chip Cookies trace their origins to the early 1930s in the United States, where Ruth Wakefield first created the chocolate chip cookie.
• The dish evolved over the decades as bakers began experimenting with different ingredients, adding sea salt for an elevated flavor experience.
• In American culture, these cookies are a staple at family gatherings, holiday celebrations, and bake sales, symbolizing comfort and home.
• While many variations exist, the authentic version maintains the classic combination of brown sugar, vanilla, and semi-sweet chocolate chips that set it apart from imitations.
Recipe Overview
Nutritional Information (per serving)
Ingredients
Essential Equipment Guide
Stand Mixer: A stand mixer is crucial for creating the perfect cookie dough texture. It allows for thorough mixing without overworking the dough. Look for a model with a powerful motor and multiple speed settings for versatility.
Baking Sheet: A heavy-duty baking sheet ensures even heat distribution, which is key for achieving the ideal cookie texture. Consider using a non-stick or parchment-lined sheet to prevent sticking and facilitate easy removal.
Cookie Scoop: This tool helps create uniform cookie sizes for even baking. A medium-sized scoop (about 2 tablespoons) is ideal for this recipe, ensuring each cookie bakes consistently.
Preparation Methods
Creaming Butter and Sugars: This technique involves beating softened butter with sugars until light and fluffy. This step is crucial as it incorporates air, which helps the cookies rise and gives them a light texture. Use medium speed on your mixer for about 3-4 minutes to achieve the right consistency.
Chilling the Dough: Chilling the cookie dough before baking helps the cookies hold their shape and enhances the flavors. Wrap the dough in plastic wrap and refrigerate for at least 30 minutes. This step is essential for chewy cookies with a gooey center.
Using a Cookie Scoop: Utilizing a cookie scoop ensures uniform cookie sizes, which is important for even baking. It also minimizes mess and makes it easier to portion your dough. Choose a scoop that holds about 2 tablespoons of dough for the perfect cookie size.
Step 1: Prepare Ingredients

Gather all your ingredients on a clean workspace.
Make sure to measure each ingredient accurately for the best results.
Sifting the flour and baking soda together will help aerate the mixture.
Prepping your ingredients ahead of time streamlines the baking process.
Step 2: Cream Butter and Sugars

In a stand mixer, add the softened butter, brown sugar, and granulated sugar.
Beat on medium speed until the mixture is light and fluffy, about 3-4 minutes.
Make sure to scrape down the sides of the bowl to ensure even mixing.
This step is crucial for incorporating air into the dough.
Step 3: Add Eggs and Vanilla

Once the butter and sugars are creamed, add the eggs one at a time.
Mix in the vanilla extract until fully combined.
Make sure the mixture is smooth and uniform in color.
This step adds moisture and flavor to the cookie dough.
Step 4: Combine Dry Ingredients

In a separate bowl, whisk together the flour, baking soda, and salt.
Gradually add the dry ingredients to the wet ingredients in the stand mixer.
Mix on low speed until just combined to avoid overmixing.
This ensures your cookies will be tender and not tough.
Step 5: Fold in Chocolate Chips

Remove the bowl from the mixer and add the semi-sweet and milk chocolate chips.
Use a spatula to gently fold the chocolate into the dough until evenly distributed.
Avoid overmixing to keep the dough light and airy.
This step creates those delightful gooey pockets of chocolate.
Step 6: Chill the Dough

Wrap the cookie dough in plastic wrap and refrigerate for at least 30 minutes.
Chilling helps the flavors meld and the dough to firm up.
This step is crucial for preventing the cookies from spreading too much during baking.
Plan ahead to ensure you allow enough chilling time.
Step 7: Preheat the Oven

While the dough is chilling, preheat your oven to 350°F (175°C).
Ensure the oven is fully heated before baking for even cooking.
A properly preheated oven prevents the cookies from spreading too quickly.
Use an oven thermometer for accuracy if necessary.
Step 8: Scoop the Cookies

Once the dough is chilled, use a cookie scoop to portion out the dough onto a baking sheet.
Leave about 2 inches of space between each cookie to allow for spreading.
Use a parchment-lined baking sheet for easy cleanup.
This ensures uniform cookie sizes and even baking.
Step 9: Bake the Cookies

Place the baking sheet in the preheated oven and bake for 10-12 minutes.
Look for the edges to be golden while the centers remain soft.
Remove from the oven when they still look slightly underbaked, as they will continue to set.
This step ensures that the cookies are chewy and gooey.
Step 10: Sprinkle with Sea Salt

Immediately after removing the cookies from the oven, sprinkle a pinch of sea salt on top.
This enhances the flavor and provides a delightful contrast to the sweetness.
Let the cookies cool on the baking sheet for a few minutes before transferring them.
This step adds that finishing touch that elevates the cookie experience.
Step 11: Cool and Enjoy

Transfer the cookies to a wire rack to cool completely.
Serve warm or at room temperature for the best texture.
These cookies can be stored in an airtight container for several days.
Enjoy them with a glass of milk or your favorite beverage.
Critical Timing and Temperature Guide
Chilling the Dough: Chill the cookie dough for at least 30 minutes before baking. This helps the cookies maintain their shape and enhances flavor. Avoid skipping this step to ensure the desired texture.
Baking Time: Bake cookies for 10-12 minutes. Watch for golden edges and soft centers. Removing the cookies from the oven when they still appear slightly underbaked will result in a chewy texture.
Cooling Time: Allow cookies to cool on the baking sheet for 5 minutes before transferring them to a wire rack. This helps them set while retaining their gooey centers.
Pro Tips for Sea Salt Chocolate Chip Cookies Recipes Chewy And Gooey
• Ingredient Selection: Choose high-quality chocolate chips for the best flavor. Semi-sweet and milk chocolate combinations create a rich profile.
• Preparation Secret: For extra depth, consider browning the butter before mixing it with sugars. This adds a nutty flavor that enhances the cookies.
• Temperature Management: Ensure your ingredients are at room temperature, especially the butter and eggs, for optimal mixing.
• Texture Enhancement: Experiment with adding a tablespoon of cornstarch for a softer, more tender cookie.
• Flavor Layering: Add a teaspoon of espresso powder to the dry ingredients for a subtle enhancement of chocolate flavor.
• Make-Ahead Strategies: You can prepare the dough and freeze it. Scoop balls of dough onto a baking sheet, freeze, then transfer to a bag for later baking.
• Restaurant-Quality Finishing Touches: Drizzle melted chocolate over the cookies for an elegant presentation.
• Equipment Optimization: Invest in a quality baking sheet to ensure even heat distribution during baking.
Troubleshooting Common Issues
• Cookies Spread Too Much: This can be caused by warm dough or not chilling it long enough. Always chill the dough for at least 30 minutes before baking.
• Texture Too Hard: Overbaking is the common culprit. Remove the cookies from the oven when they still appear slightly underbaked for a chewy texture.
• Flavor Too Sweet: If cookies are overly sweet, consider reducing the amount of sugar in the recipe. Balance it with a little more salt.
• Cookies Burned on Edges: Ensure your oven temperature is accurate. An oven thermometer can help avoid this issue.
• Chocolate Chips Not Melting: If your chips are too cold, they may not melt properly. Let them warm up slightly before mixing them into the dough.
Variations and Regional Differences
• Nut-Studded Variation: In some regions, bakers add chopped nuts like pecans or walnuts for added crunch and flavor.
• Oatmeal Chocolate Chip Cookies: A popular twist includes oats, which add chewiness and a wholesome texture to the cookies.
• Double Chocolate Version: Some variations use cocoa powder in the dough for a richer chocolate flavor, along with chocolate chips.
• Modern Interpretations: Today’s bakers may experiment with plant-based butters and gluten-free flours, allowing for a broader range of dietary adaptations while maintaining the cookie’s spirit.
Food Science Behind the Recipe
• Maillard Reaction: This is the chemical reaction that occurs when sugars and proteins are heated, giving the cookies their golden color and complex flavors. Understanding this helps bakers control the browning process.
• Hydration and Gluten Development: The flour’s proteins absorb moisture and develop gluten, which gives structure to the cookies. Balancing hydration is essential for achieving the desired texture.
• Fat and Sugar Interaction: The creaming of butter and sugar incorporates air, which helps raise the cookies during baking. The fat also contributes to the tender crumb of the final product.
Frequently Asked Questions
What’s the most common mistake people make when preparing Sea Salt Chocolate Chip Cookies? One of the biggest mistakes is not chilling the dough, which can lead to overly flat cookies. Always allow time for chilling to ensure the right texture.
Can I prepare components of this dish in advance? Yes, you can prepare the cookie dough and refrigerate it for up to 3 days or freeze it for up to 3 months. Just thaw before baking.
How do I adapt this recipe for dietary restrictions? For gluten-free options, substitute all-purpose flour with a gluten-free blend. For dairy-free, use plant-based butter and dairy-free chocolate chips.
What’s the best way to store and reheat leftovers? Store cookies in an airtight container at room temperature for up to a week. Reheat in the microwave for 10-15 seconds to restore softness.
Can I freeze this dish? Yes, cookies freeze well. Place them in an airtight container or freezer bag, separating layers with parchment paper. Thaw at room temperature before enjoying.
What wine or beverages pair best with this dish? A glass of milk or a nice cup of coffee pairs beautifully with these cookies, enhancing the chocolate flavor.
How can I scale this recipe up for a crowd? Simply multiply the ingredients by the number of servings you need. Ensure you have enough baking sheets and oven space to accommodate the larger batch.
What side dishes complement this recipe best? Fresh fruit or a scoop of vanilla ice cream works well as a refreshing contrast to the richness of the cookies.
How do professional chefs elevate this dish for restaurant service? Chefs may serve these cookies warm with a scoop of ice cream on top, drizzled with chocolate sauce for a decadent dessert.
Serving and Presentation Guide
• Traditional Presentation: Serve cookies warm on a simple white plate, allowing the golden color and texture to shine. A sprinkle of sea salt on top adds visual appeal.
• Modern Plating Ideas: Stack cookies in a glass jar for a rustic look, or arrange them on a slate board with chocolate sauce drizzled artistically around.
• Accompaniment Suggestions: Serve with a side of fresh fruit, such as strawberries or raspberries, to cut through the sweetness.
• Special Occasion Presentation: For celebrations, stack cookies in tiers on a decorative cake stand and garnish with edible flowers or chocolate curls for an elegant touch.
Conclusion
I hope you give these Sea Salt Chocolate Chip Cookies a try in your kitchen.
They’re perfect for sharing with loved ones or indulging in a quiet moment alone.
Baking is a wonderful way to create memories and enjoy delicious treats.
Happy baking!