
Chocolate peanut butter ice cream is a beloved treat that perfectly marries two of the most indulgent flavors in dessert history.
The rich, creamy chocolate base is beautifully complemented by the nutty, salty notes of peanut butter, creating a symphony of taste that feels both nostalgic and luxurious.
I first fell in love with this flavor combination while enjoying a sundae at a local ice cream parlor, where each bite was a delightful reminder of childhood sweets.
Whether you’re cooling off in the summer or simply craving a sweet treat any time of year, this Cuisinart Ice Cream Maker recipe is sure to satisfy your cravings.
The History and Cultural Significance
• Chocolate and peanut butter first gained popularity in the United States in the early 20th century, with recipes appearing in cookbooks as early as the 1930s.
• The combination of these two flavors became iconic due to the success of brands like Reese’s, which solidified their pairing in American culture.
• In the U.S., chocolate peanut butter desserts often appear at summer barbecues, birthday parties, and holiday gatherings, symbolizing indulgence and celebration.
• While variations exist globally, the classic American version remains a favorite due to its simple yet satisfying flavor profile.
Recipe Overview
Nutritional Information (per serving)
Ingredients
Essential Equipment Guide
Cuisinart Ice Cream Maker: This specific tool is essential for creating a smooth and creamy ice cream texture. While alternatives exist, Cuisinart models have reliable freezing capabilities and ease of use, making them a popular choice for home cooks.
Mixing Bowl: A sturdy mixing bowl is needed to combine the ingredients before churning. Opt for a bowl that is large enough to allow room for mixing without spilling, preferably stainless steel or glass for ease of cleaning.
Whisk: A whisk is crucial for thoroughly blending the ingredients to ensure a uniform mixture. Whether you choose a hand or electric whisk, ensure it has a comfortable grip and sturdy construction for optimal results.
Preparation Methods
Mixing Ingredients: This technique involves combining the base ingredients thoroughly to create a smooth mixture. It’s crucial to whisk the sugar into the cream until fully dissolved to avoid graininess in the final product. Make sure to incorporate the peanut butter until completely blended for a uniform flavor. This step is essential for achieving a creamy texture.
Churning Ice Cream: Churning in the ice cream maker incorporates air into the mixture, giving it that light and fluffy texture. Follow the manufacturer’s instructions for your machine, ensuring the bowl is adequately frozen beforehand. Keep an eye on the ice cream as it thickens to avoid over-churning, which can lead to a grainy texture.
Swirling Chocolate: Swirling the melted chocolate into the ice cream at the end of churning creates beautiful ribbons of chocolate throughout. Allow the chocolate to cool slightly before adding it to avoid melting the ice cream. Use a spatula to gently fold in the chocolate, ensuring even distribution without over-mixing.
Step 1: Prepare Ingredients

Gather all ingredients and measure them accurately.
Make sure to use room temperature peanut butter for easy mixing.
Check that your ice cream maker’s bowl has been properly frozen according to the manufacturer’s instructions.
This preparation ensures a smooth and streamlined process when you start mixing and churning.
Step 2: Mix Base Ingredients

In a mixing bowl, combine the heavy cream, whole milk, granulated sugar, and vanilla extract.
Whisk the mixture vigorously until the sugar is completely dissolved and the ingredients are well blended.
Add the creamy peanut butter next, and whisk until the mixture is smooth and uniform in color.
This step is crucial for achieving a creamy texture without any lumps.
Step 3: Melt Chocolate

In a small microwave-safe bowl, combine the semi-sweet chocolate chips and coconut oil.
Microwave in 20-second intervals, stirring in between, until fully melted and smooth.
Be careful not to overheat, as chocolate can seize up if too hot.
Let the chocolate cool slightly before adding it to the ice cream mixture.
Step 4: Churn the Ice Cream

Pour the peanut butter ice cream mixture into the pre-frozen ice cream maker bowl.
Turn on the machine and churn according to the manufacturer’s instructions, usually about 20-25 minutes.
Watch for the mixture to thicken significantly and take on a soft-serve consistency.
Avoid over-churning, as this can lead to a grainy texture.
Step 5: Add Chocolate Swirl

Once the ice cream has reached a soft-serve consistency, gently drizzle the melted chocolate into the mixture.
Use a spatula to fold the chocolate into the ice cream, creating swirls without over-mixing.
The goal is to have ribbons of chocolate throughout the ice cream.
This step adds visual appeal as well as flavor.
Step 6: Transfer to Container

Scoop the ice cream into an airtight container for freezing.
Pack it down tightly to eliminate air pockets, which can cause ice crystals to form.
Cover with a lid or plastic wrap, pressing it directly against the surface of the ice cream.
This step is important for keeping the ice cream smooth and creamy during storage.
Step 7: Freeze

Place the container in the freezer and allow the ice cream to harden for at least 4 hours.
For best results, let it freeze overnight to achieve a firm texture.
Make sure to keep the container covered to prevent ice crystals from forming.
This freezing time is essential for achieving the right scoopable consistency.
Step 8: Serve and Enjoy

Once the ice cream is fully frozen, scoop it into bowls or cones for serving.
Consider adding toppings like crushed peanuts, chocolate drizzle, or whipped cream for an extra indulgent treat.
Serve immediately for the best texture, or return leftovers to the freezer.
Enjoy the creamy, rich flavors of your homemade chocolate peanut butter ice cream.
Critical Timing and Temperature Guide
Churning Ice Cream: Aim for about 20-25 minutes of churning time. You’ll know it’s ready when the mixture has thickened significantly and resembles soft-serve ice cream. Avoid over-churning, which can lead to a grainy texture.
Freezing Time: Allow the ice cream to freeze for a minimum of 4 hours, though overnight is preferable for a firmer texture. Check that the container is well-sealed to prevent ice crystals from forming on the surface.
Chocolate Temperature: When melting the chocolate, use short intervals in the microwave to ensure it remains smooth and doesn’t seize. If it becomes too hot, allow it to cool slightly before mixing it into the ice cream.
Pro Tips for Cuisinart Ice Cream Maker Recipes Chocolate Peanut Butter Flavor
• Ingredient Selection: Use high-quality chocolate and fresh peanut butter for the best flavor. Look for chocolate with a cocoa content of at least 60% for richness.
• Preparation Secret: Allow your heavy cream and milk to chill in the refrigerator before mixing for a smoother texture.
• Temperature Management: Ensure your ice cream maker bowl is completely frozen for at least 24 hours before use to achieve the best results.
• Texture Enhancement: For a softer texture, let the ice cream sit at room temperature for about 10 minutes before scooping.
• Flavor Layering: Consider adding a pinch of sea salt to enhance the flavors of chocolate and peanut butter.
• Make-Ahead Strategies: You can prepare the base mixture a day in advance and store it in the refrigerator until ready to churn.
• Restaurant-Quality Finishing Touches: Serve with a dollop of whipped cream and a sprinkle of chopped peanuts for an elegant touch.
• Equipment Optimization: Regularly clean your ice cream maker to ensure optimal performance and longevity.
Troubleshooting Common Issues
• Texture Too Dense: This can occur if the mixture was over-churned or if the ice cream maker bowl wasn’t cold enough. To fix this, ensure the bowl is thoroughly frozen before starting and monitor the churning time closely.
• Separation of Mixture: If the ingredients separate, it might be due to not whisking thoroughly or using cold ingredients. Make sure to whisk until fully combined and use ingredients at room temperature for best results.
• Ice Crystals Forming: This typically happens when the ice cream isn’t stored properly. To prevent this, keep the container tightly sealed and store it in the coldest part of the freezer.
• Flavor Too Mild: If the flavor is not as strong as desired, it may be due to not using enough peanut butter or chocolate. Adjust these ingredients in your next batch for a more robust flavor.
• Chocolate Not Swirling: If the chocolate doesn’t swirl well, it may be too hot or too thick. Ensure it cools slightly before adding and drizzle it in gently to achieve the desired effect.
Variations and Regional Differences
• Chunky Monkey: This variation adds banana puree into the base for a fruity twist. It’s a delightful combination that enhances the flavor profile with natural sweetness.
• Peanut Butter Cup: Incorporate chopped Reese’s peanut butter cups into the churned ice cream for extra texture and chocolatey goodness.
• Vegan Option: Substitute heavy cream and milk with coconut cream and almond milk, and use a plant-based chocolate for a delicious dairy-free version.
• Modern Interpretations: Consider adding ingredients like sea salt or espresso powder to elevate the flavor, reflecting current culinary trends.
Food Science Behind the Recipe
• Emulsification: The process of blending fat (cream and peanut butter) with liquids (milk) creates a stable mixture that contributes to a creamy texture. Understanding emulsification helps achieve better mouthfeel in ice cream.
• Freezing Point Depression: Sugar and fat lower the freezing point of the mixture, preventing it from becoming too hard. This knowledge allows for smoother ice cream that remains scoopable.
• Air Incorporation: Churning incorporates air into the mixture, creating a light and fluffy texture. Knowing how to manage this process is key to achieving the ideal ice cream consistency.
Frequently Asked Questions
What’s the most common mistake people make when preparing chocolate peanut butter ice cream? The most common mistake is not mixing the ingredients thoroughly, which can lead to uneven flavor and texture. Ensure all components are well combined before churning.
Can I prepare components of this dish in advance? Yes, you can prepare the ice cream base a day ahead and store it in the refrigerator. Make sure to cover it tightly to prevent any off-flavors from developing.
How do I adapt this recipe for dietary restrictions? For a vegan version, use coconut cream and almond milk, and ensure your chocolate is dairy-free. This alteration will maintain the rich flavors while accommodating dietary needs.
What’s the best way to store and reheat leftovers? Store leftovers in an airtight container in the freezer. To enjoy later, let it sit at room temperature for a few minutes before scooping to soften.
Can I freeze this dish? Yes, this ice cream is designed to be frozen. Ensure it’s sealed tightly to avoid freezer burn.
What wine or beverages pair best with this dish? A rich dessert wine like a port or a stout beer complements the flavors of chocolate and peanut butter beautifully.
How can I scale this recipe up for a crowd? Simply multiply the ingredients by the number of servings you need, but ensure your ice cream maker can handle the increased volume without overflowing.
What side dishes complement this recipe best? Pair it with a simple fruit salad or a slice of chocolate cake for a delightful dessert combination.
How do professional chefs elevate this dish for restaurant service? Professional chefs often add a touch of flavored salt or serve with a homemade cookie for an upscale presentation.
Serving and Presentation Guide
• Traditional Presentation: Serve the ice cream in chilled bowls with a sprinkle of crushed peanuts on top for an authentic touch. Use a scoop with a warm water dip for perfect round scoops.
• Modern Plating Ideas: Consider serving the ice cream in a tall glass layered with chocolate sauce and topped with whipped cream for a fun sundae-style presentation.
• Accompaniment Suggestions: Pair with fresh berries or a drizzle of caramel sauce to enhance the dessert experience.
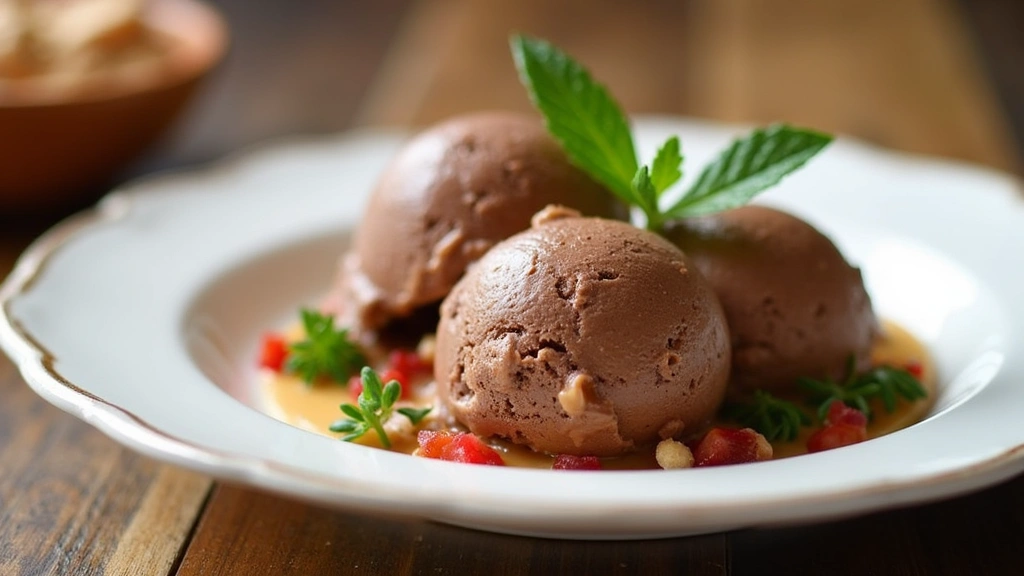
• Special Occasion Presentation: For celebrations, serve in elegant dessert cups with a garnish of mint and a dusting of cocoa powder for an upscale appearance.
Conclusion
This chocolate peanut butter ice cream recipe is not just a dessert, but a delightful experience that brings joy with every scoop.
I encourage you to try making this at home; the combination of flavors and textures is truly irresistible.
Whether enjoyed on a hot summer day or as a late-night snack, it’s sure to become a favorite in your household.