
Chocolate Peanut Butter Dump Cake is a delightful dessert that combines two of the most beloved flavors: chocolate and peanut butter.
This easy-to-make cake is perfect for those who crave a rich, indulgent treat without spending hours in the kitchen.
The layers of moist chocolate cake, creamy peanut butter, and a crispy topping create a deliciously satisfying experience.
Whether it’s for a casual family gathering or a festive celebration, this dump cake will surely impress your guests and leave them wanting more.
The History and Cultural Significance
• Chocolate Peanut Butter Dump Cake Recipes Quick and Delicious traces its origins to the American baking scene of the late 20th century, where quick and easy recipes gained popularity.
• The dish evolved over decades as home cooks started experimenting with convenient ingredients like cake mixes and instant pudding, eventually becoming the beloved version we know today.
• In the United States, this dish traditionally appears at potlucks and family gatherings, symbolizing warmth and comfort.
• While many variations exist across different households, the authentic version maintains a balance of rich chocolate and creamy peanut butter that sets it apart from imitations.
Recipe Overview
Nutritional Information (per serving)
Ingredients
Essential Equipment Guide
Mixing Bowl: A large mixing bowl is essential for combining the ingredients thoroughly without making a mess. Look for a bowl that is sturdy and easy to handle, ideally with a non-slip base to prevent slipping during mixing.
Baking Dish: A 9×13-inch baking dish is ideal for this recipe as it allows the cake to cook evenly. Consider using a glass or ceramic dish, which helps retain heat and provides a nice browning effect on the edges.
Spatula: A flexible spatula is important for scraping down the sides of the bowl and ensuring all ingredients are well combined. Choose a heat-resistant silicone spatula for durability and ease of use.
Preparation Methods
Dump Cake Technique: The essence of a dump cake is simplicity; all ingredients are combined into one dish without the need for elaborate mixing. This method saves time and effort while still producing a delicious dessert. Ensure even distribution of ingredients for the best results.
Layering Ingredients: When preparing the dump cake, layering the peanut butter and chocolate chips on top of the batter creates a delightful texture contrast. Make sure to distribute them evenly to ensure each slice has a balance of flavors.
Baking and Cooling: Proper baking time is essential to achieve a gooey yet firm texture. Keep an eye on the cake during the last 10 minutes of baking, as ovens can vary in temperature.
Step 1: Prepare Ingredients

Gather all the ingredients needed for the cake.
Make sure to measure each ingredient accurately for the best results.
Prep any additional items like baking spray for greasing the pan.
Having everything ready will streamline the process.
Step 2: Preheat Oven

Begin by preheating your oven to 350°F (175°C).
This ensures that the cake bakes evenly from the moment it goes in.
Check to make sure the oven has reached the desired temperature before placing the cake inside.
Using an oven thermometer can help maintain accuracy.
Step 3: Combine Cake Ingredients

In a mixing bowl, add the chocolate cake mix and water.
Use a spatula to mix until there are no lumps and the batter is smooth.
Ensure the mixture is well combined to achieve a uniform texture.
This is the foundation of your cake, so mix thoroughly.
Step 4: Add Peanut Butter and Chocolate Chips

Fold in the creamy peanut butter and melted chocolate chips into the cake batter.
Gently mix until all ingredients are well incorporated without over-mixing.
The batter should take on a rich, creamy texture with visible flecks of chocolate.
This step adds depth and flavor that elevates the cake.
Step 5: Pour Batter into Baking Dish

Grease the baking dish with cooking spray or butter to prevent sticking.
Pour the batter into the prepared baking dish, smoothing the top with a spatula.
Evenly distribute the batter to ensure uniform baking.
This ensures that all parts of the cake bake at the same rate.
Step 6: Bake the Cake

Place the baking dish in the preheated oven and bake for 35-40 minutes.
Keep an eye on the cake as it bakes; it should rise and start to crack on the top.
A toothpick inserted in the center should come out clean or with a few moist crumbs.
This indicates that the cake is fully baked.
Step 7: Prepare the Topping

While the cake is baking, prepare the topping by mixing powdered sugar and milk in a bowl.
Stir until you achieve a smooth, pourable consistency.
This will create a sweet glaze that complements the cake perfectly.
Adjust the milk quantity if necessary to achieve the desired thickness.
Step 8: Glaze the Cake

Once the cake is baked, remove it from the oven and let it cool for 10 minutes.
Drizzle the prepared glaze over the warm cake, allowing it to soak in slightly.
This adds an extra layer of sweetness and moisture.
You can also sprinkle chopped peanuts on top for an added crunch.
Step 9: Serve and Enjoy

Once the cake has cooled slightly, slice it into squares for serving.
Plate the squares and serve warm with a scoop of vanilla ice cream, if desired.
The combination of warm cake and cold ice cream creates a delightful contrast.
Enjoy the rich flavors of chocolate and peanut butter as they meld together.
Critical Timing and Temperature Guide
Baking Time: Bake the cake for 35-40 minutes at 350°F (175°C). Look for a slight crack on top and a toothpick that comes out clean. Avoid opening the oven too often to maintain consistent heat.
Cooling Time: Allow the cake to cool for at least 10 minutes before glazing. This helps the topping adhere better and prevents the cake from falling apart when served.
Serving Temperature: Serve the cake warm for the best flavor experience. If serving later, reheat briefly in the microwave to restore its warmth.
Pro Tips for Chocolate Peanut Butter Dump Cake Recipes Quick And Delicious
• Ingredient Selection: Use high-quality peanut butter for a richer flavor. Natural peanut butter without added sugar or oils works wonderfully.
• Preparation Secret: Let your eggs come to room temperature before mixing for a smoother batter.
• Temperature Management: Always preheat your oven for even baking and consistent results.
• Texture Enhancement: For a fudgier cake, reduce the baking time by a few minutes.
• Flavor Layering: Add a pinch of salt to the batter to enhance the chocolate flavor.
• Make-Ahead Strategies: Prepare the cake batter a day ahead and refrigerate it until you’re ready to bake.
• Restaurant-Quality Finishing Touches: Top the cake with whipped cream or a drizzle of chocolate sauce for an elegant presentation.
• Equipment Optimization: Use a non-stick baking dish or line with parchment paper for easier cleanup.
Troubleshooting Common Issues
• Undercooked Cake: If the cake is still wet in the center after baking, return it to the oven for an additional 5-10 minutes. Always check with a toothpick.
• Crumbly Texture: This can occur if too much flour is added. Ensure you measure accurately and avoid overmixing.
• Too Sweet: If the cake is overly sweet, try reducing the amount of sugar in the topping.
• Dry Cake: Overbaking can lead to a dry texture. Monitor the baking time closely.
• Peanut Butter Not Mixing Well: If the peanut butter clumps, warm it slightly in the microwave to soften before adding it to the batter.
Variations and Regional Differences
• Gluten-Free Variation: Substitute the chocolate cake mix with a gluten-free version to accommodate dietary restrictions, ensuring all other ingredients are also gluten-free.
• Nut-Free Version: Replace peanut butter with sun butter or omit it entirely for a nut-free version.
• Chocolate Peanut Butter Swirl: For a decadent twist, create a swirl effect by layering half the batter, adding dollops of peanut butter, and then topping with the remaining batter before baking.
• Modern Interpretations: Incorporate trendy flavors like sea salt or espresso powder to enhance the richness of the chocolate.
Food Science Behind the Recipe
• Maillard Reaction: This is the chemical reaction that occurs when the sugars and proteins in the cake batter react to heat, resulting in a rich brown color and complex flavors.
• Emulsification: The mixing of creamy peanut butter and cake batter creates a stable mixture, allowing the fats to blend well and provide a moist texture.
• Leavening Action: The baking powder in the cake mix helps the cake rise, creating a light and fluffy texture despite the density of peanut butter.
Frequently Asked Questions
What’s the most common mistake people make when preparing Chocolate Peanut Butter Dump Cake? The most common mistake is overmixing the batter, which can lead to a dense cake. Mix just until combined for a lighter texture.
Can I prepare components of this dish in advance? Yes, you can prepare the cake batter in advance and refrigerate it for up to 24 hours before baking.
How do I adapt this recipe for dietary restrictions? Substitute the cake mix with a gluten-free option for a gluten-free version, and use nut-free butter alternatives for nut allergies.
What’s the best way to store and reheat leftovers? Store leftovers in an airtight container in the refrigerator for up to 3 days. Reheat slices in the microwave for a few seconds to restore warmth.
Can I freeze this dish? Yes, freeze the fully baked cake in an airtight container for up to 2 months. Thaw in the refrigerator overnight before reheating.
What wine or beverages pair best with this dish? A dessert wine like Port or a glass of cold milk pairs wonderfully with the rich flavors of chocolate and peanut butter.
How can I scale this recipe up for a crowd? To serve a larger group, double the ingredients and bake in a larger pan, adjusting the baking time as needed.
What side dishes complement this recipe best? Fresh fruit salad or vanilla ice cream perfectly balance the richness of the cake.
How do professional chefs elevate this dish for restaurant service? Chefs often add gourmet touches such as homemade sauces or artisanal ice creams to enhance the presentation and flavor profile.
Serving and Presentation Guide
• Traditional Presentation: Serve the cake directly from the baking dish, dusted with powdered sugar and accompanied by a scoop of ice cream on the side.
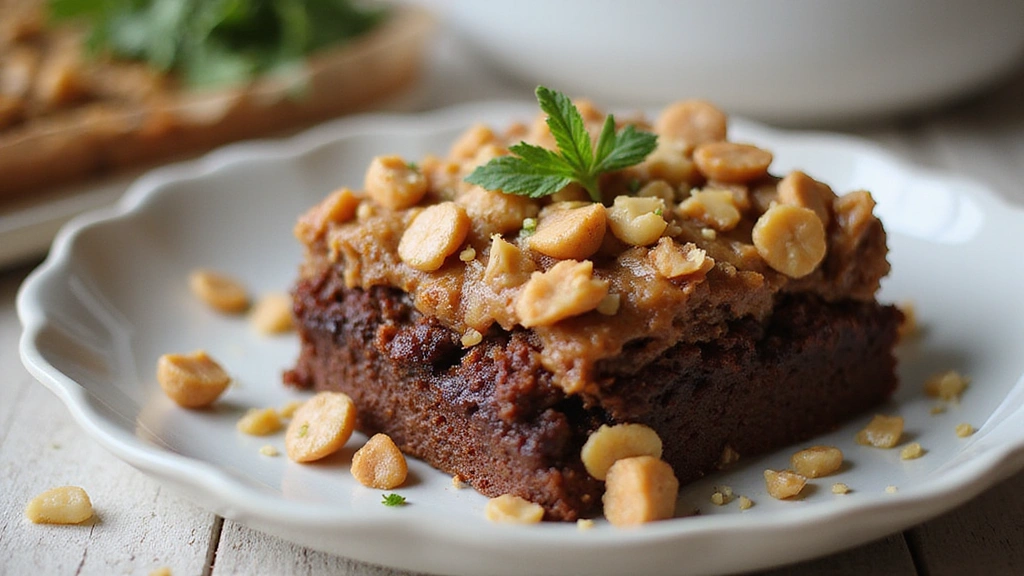
• Modern Plating Ideas: Plate individual slices on white plates with a drizzle of chocolate sauce and a sprinkle of chopped peanuts or sea salt for a contemporary look.
• Accompaniment Suggestions: Pair with fresh berries or a light fruit compote to cut through the richness of the cake.
• Special Occasion Presentation: For celebrations, layer the cake with a rich chocolate ganache and garnish with edible gold leaf or fresh mint for an elegant touch.
Conclusion
This Chocolate Peanut Butter Dump Cake is not only quick and easy to make but also incredibly delicious.
With its rich flavors and comforting texture, it’s sure to become a favorite in your household.
I encourage you to try this recipe and share it with friends and family for a delightful treat.
Happy baking!