
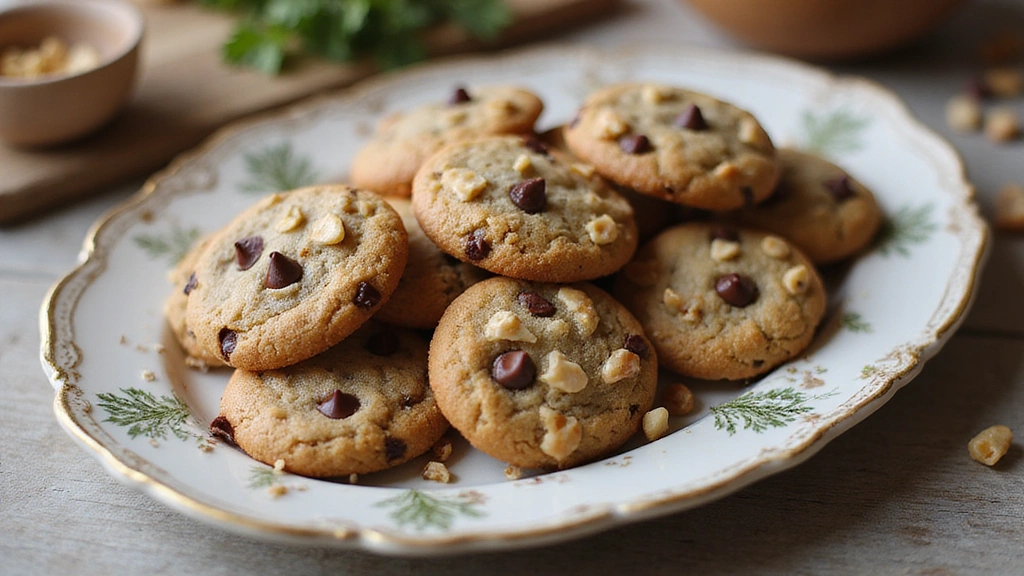
Chocolate Chip Cookies with Nuts are a timeless treat that evokes memories of childhood baking and family gatherings.
The combination of gooey chocolate and crunchy nuts creates a delightful contrast that satisfies every craving.
I remember my grandmother’s kitchen, filled with the warm aroma of freshly baked cookies, inviting everyone to indulge.
Whether you enjoy them soft and chewy or prefer a crispier version, this recipe delivers a perfect balance that will impress your friends and family.
The History and Cultural Significance
• Chocolate Chip Cookies with Nuts trace their origins to the United States in the 1930s, where Ruth Wakefield first created them at the Toll House Inn.
• The dish evolved over decades as variations emerged, with the addition of nuts becoming a popular choice for texture and flavor.
• In American culture, these cookies traditionally appear at holiday gatherings and bake sales, symbolizing comfort and togetherness.
• While many variations exist across different regions, the authentic version maintains a balance of sweetness and richness that sets it apart from imitations.
Recipe Overview
Nutritional Information (per serving)
Ingredients
Essential Equipment Guide
Stand Mixer: A stand mixer is essential for achieving the perfect cookie dough consistency. It allows for thorough mixing without tiring your arms, ensuring ingredients are evenly incorporated. Look for a model with multiple speed settings and a sturdy bowl.
Baking Sheets: Quality baking sheets ensure even heat distribution, preventing burnt bottoms and uneven baking. Non-stick or silicone-coated sheets are ideal, but heavy-duty aluminum sheets can also work well.
Cookie Scoop: A cookie scoop provides uniform cookie sizes, ensuring even baking. Choose a scoop that is comfortable to hold and has a release mechanism for easy dough transfer.
Preparation Methods
Creaming: Creaming is the process of beating butter and sugar together until light and fluffy. This technique incorporates air into the mixture, resulting in a lighter texture. Aim for a pale color and a fluffy texture before adding eggs.
Chilling the Dough: Chilling the cookie dough before baking helps prevent spreading, resulting in thicker cookies. Wrap the dough in plastic wrap and refrigerate for at least 30 minutes before scooping onto the baking sheet.
Proper Measuring: Accurate measurement of ingredients is crucial for baking success. Use a kitchen scale for precision or the spoon-and-level method for dry ingredients to avoid overly dense or dry cookies.
Step 1: Prepare Ingredients

Gather all your ingredients on the counter to ensure you have everything ready.
Measure out the flour, baking soda, salt, sugars, butter, eggs, and chocolate chips.
Make sure the butter is at room temperature for easy creaming.
Preheat your oven to 350°F (175°C) while you prepare the dough.
Step 2: Cream Butter and Sugars

In a stand mixer fitted with the paddle attachment, combine softened butter, brown sugar, and granulated sugar.
Beat on medium speed until the mixture is light and fluffy, about 3-5 minutes.
Look for a pale, creamy texture that indicates proper aeration.
Scrape down the sides of the bowl to ensure all ingredients are well incorporated.
Step 3: Add Eggs and Vanilla

Add the eggs, one at a time, mixing well after each addition.
Pour in the vanilla extract and continue mixing until fully incorporated.
The batter should appear smooth and slightly glossy at this stage.
Take care not to over-mix, as this can lead to tough cookies.
Step 4: Combine Dry Ingredients

In a separate bowl, whisk together the flour, baking soda, and salt until well combined.
This step ensures the leavening agent is evenly distributed throughout the flour.
Gradually add the dry ingredients to the wet mixture, mixing on low speed until just combined.
Avoid over-mixing to keep the cookies light and tender.
Step 5: Fold in Chocolate Chips and Nuts

Using a spatula, fold in the chocolate chips and chopped nuts until evenly distributed.
Be gentle to maintain the airiness of the dough while ensuring the mix-ins are well incorporated.
The dough should be thick and full of chocolate and nut pieces.
Set the bowl aside and prepare the baking sheets.
Step 6: Scoop the Dough

Using a cookie scoop or spoon, drop rounded tablespoons of dough onto prepared baking sheets.
Leave ample space between the cookies to allow for spreading during baking.
Aim for uniform size to ensure even baking.
If desired, sprinkle a few extra chocolate chips on top for presentation.
Step 7: Bake the Cookies

Place the baking sheets in the preheated oven and bake for 9-11 minutes.
The edges should be golden brown while the centers remain soft.
Keep a close eye to prevent over-baking, as cookies will continue to firm up once removed from the oven.
Rotate the sheets halfway through for even baking.
Step 8: Cool and Serve

Once baked, remove the cookies from the oven and let them cool on the baking sheets for 5 minutes.
Transfer the cookies to a wire rack to cool completely.
Enjoy them warm or store in an airtight container for later.
These cookies are perfect with a glass of milk or a cup of coffee.
Critical Timing and Temperature Guide
Baking Time: Bake the cookies for 9-11 minutes at 350°F (175°C). Look for golden edges and soft centers as indicators of doneness. Avoid over-baking, or cookies will become hard.
Cooling Time: Allow cookies to cool on the baking sheet for 5 minutes before transferring to a wire rack. This helps them set properly while still being soft.
Storage Temperature: Store cookies in an airtight container at room temperature for up to one week. For longer shelf life, freeze cookies for up to three months.
Pro Tips for Chocolate Chip Cookies With Nuts Recipes Classic And Crunchy
• Ingredient Selection: Choose high-quality chocolate chips and fresh nuts for the best flavor. Look for brands with high cocoa content for rich chocolatey goodness.
• Preparation Secret: Chill your dough for at least 30 minutes before baking to prevent spreading and achieve thicker cookies.
• Temperature Management: Ensure your butter is at room temperature for easy creaming, but not melted, which can lead to greasy cookies.
• Texture Enhancement: For crunchier cookies, bake them a minute or two longer and allow them to cool on the baking sheet before transferring.
• Flavor Layering: Consider adding a pinch of sea salt on top before baking to enhance the sweetness of the chocolate.
• Make-Ahead Strategies: You can prepare the dough in advance and freeze it. Just scoop and freeze the dough balls, then bake directly from the freezer, adding a couple of minutes to the bake time.
• Restaurant-Quality Finishing Touches: Drizzle melted chocolate over the cooled cookies for a gourmet presentation.
• Equipment Optimization: Use parchment paper on your baking sheets for easy removal and clean-up.
Troubleshooting Common Issues
• Cookies Spread Too Much: This can happen if the butter is too warm or the dough wasn’t chilled. Always chill the dough for at least 30 minutes and ensure your butter is softened, not melted.
• Cookies Are Too Hard: Over-baking can lead to hard cookies. Keep a close watch during the last few minutes of baking and remove them while they’re still soft in the center.
• Flavor is Lacking: Ensure you’re using quality ingredients, especially chocolate and vanilla. A pinch of salt can also enhance sweetness and flavor.
• Cookies are Too Dense: Over-mixing after adding flour can lead to dense cookies. Mix until just combined and avoid overworking the dough.
• Inconsistent Sizes: Use a cookie scoop for uniformity. This ensures even baking and a consistent appearance.
• Nuts Burned or Overcooked: If using nuts, toast them lightly before adding to the dough to enhance flavor without burning.
Variations and Regional Differences
• New York Style: This version includes a higher ratio of brown sugar for a chewier texture and often incorporates oats for added chewiness and health benefits.
• Nut-Free Version: Simply omit the nuts and consider adding extra chocolate chips or even white chocolate for a different flavor profile.
• Double Chocolate Chip: For a chocolatey twist, replace 1/2 cup of flour with cocoa powder, creating a rich, chocolate cookie.
• Modern Interpretations: Many are now using alternative flours like almond or gluten-free blends to cater to dietary restrictions, while still maintaining a delicious flavor.
Food Science Behind the Recipe
• Creaming: This introduces air into the butter and sugar mixture, creating a light texture. The air pockets expand during baking, allowing the cookies to rise.
• Maillard Reaction: This chemical reaction between amino acids and sugars gives cookies their beautiful golden-brown color and complex flavor during baking.
• Gluten Formation: Kneading or over-mixing the dough can lead to gluten development, resulting in tough cookies. Aim for minimal handling after adding flour.
Frequently Asked Questions
What’s the most common mistake people make when preparing Chocolate Chip Cookies with Nuts? The most common mistake is over-mixing the dough, which can lead to tough cookies. Mix until just combined to keep them light and fluffy.
Can I prepare components of this dish in advance? Yes, you can prepare the dough in advance and refrigerate it for up to 3 days or freeze it for up to 3 months. Just thaw and scoop before baking.
How do I adapt this recipe for dietary restrictions? For gluten-free cookies, substitute all-purpose flour with a gluten-free blend, and for dairy-free, use coconut oil instead of butter.
What’s the best way to store and reheat leftovers? Store cookies in an airtight container at room temperature for up to a week. To reheat, place in a preheated oven at 350°F (175°C) for 5 minutes.
Can I freeze this dish? Yes, freeze the cookies in a single layer, then transfer to a container for up to 3 months. Thaw overnight in the fridge before enjoying.
What wine or beverages pair best with this dish? A glass of milk is classic, but a rich red wine like Merlot or a dark stout beer can also complement the chocolate flavors beautifully.
How can I scale this recipe up for a crowd? Doubling the recipe is easy, but be sure to bake in batches to avoid overcrowding the oven, which can lead to uneven baking.
What side dishes complement this recipe best? A scoop of vanilla ice cream or a dollop of whipped cream can elevate the cookie experience, providing a delicious contrast to the warm cookie.
How do professional chefs elevate this dish for restaurant service? They might use gourmet chocolates, serve with unique toppings like sea salt or caramel drizzle, and present them on stylish platters.
Serving and Presentation Guide
• Traditional Presentation: Serve cookies warm on a rustic wooden board with a glass of cold milk beside them. Dust with powdered sugar for a touch of elegance.
• Modern Plating Ideas: Stack cookies in a clear glass jar and use colorful fabric as a base. Include a small scoop of ice cream on the side for a trendy look.
• Accompaniment Suggestions: Pair with hot coffee, milk, or even a dessert wine to enhance the flavors.
• Special Occasion Presentation: Create cookie gift boxes with an assortment of flavors and styles, tied with a ribbon for a beautiful presentation at parties or as gifts.
Conclusion
There’s nothing quite like the aroma of homemade Chocolate Chip Cookies with Nuts wafting through your home.
I hope this recipe brings as much joy to your kitchen as it has to mine over the years.
Don’t hesitate to experiment with your favorite nuts or add-ins to make it truly your own.